If you control particle, you should set up many attributes.
And there are many methed to control particle.
I will explain how to set up particle in a simple way.
 Three important nodes of particle control
Maya controles particle with tree nodes.
Emitter - the source where particle is generated
Partile - particle itself
Fields - the forces to influence particle
 Emit prticle from object
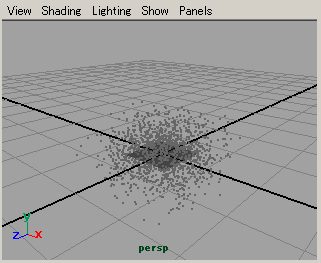
Make NURBS or Polygon object and select it,
In Dynamics Menu Set, Particles > Emit From Object
Move the Time Slider, then you will see partciles are generated as above.
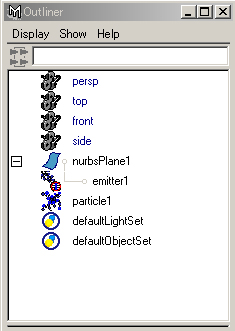
Emitter and particle are made, and emitter is the child of the object.
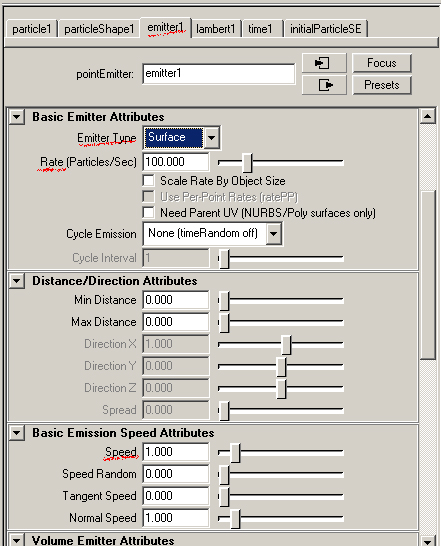
Open the Attribute Editor, selsect emitter tab, change Emitter Type Omni to Surface
Then you will see the particles are uniformly generated from surface.
Rate number where particles are generated in one second
Speed speed of particle
Speed Random randomness of speed
Tangent Speed the magnitude of the tangent component of emission speed for surface.
The default value is 0. If you enter a value greater than 0, particles are emitted randomly for surface.
Normal Speed the magnitude of the normal component of emission speed for surface.
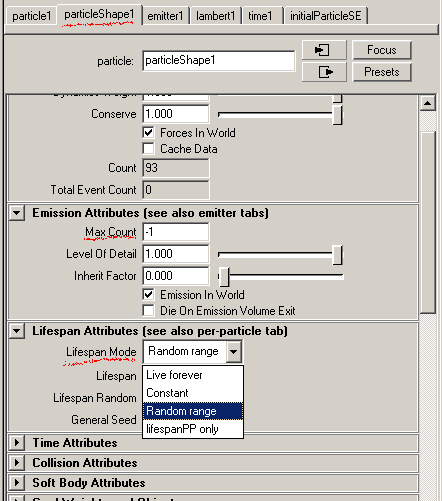
click the particleShape tab
Max Count number where particles are generated in maximum. -1 is no limit.
| Lifespan Mode | Live Forever | particles don't disappear |
| Constant | particles disappear | |
| Random range | particles disappear randomly |
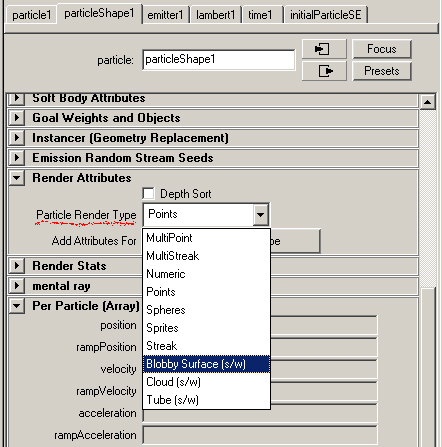
setting particle attribute(continued)
Particle Render Type
If you render with Maya Software,you should select the one of tree render type,
Blobby Surface,Cloud or Tube.
| render type | suitable expression | material | |
| Blobby Surface | Drop of water, mud | Rambert,Blinn etc | Threshold sets blending of the particles |
| Cloud | smoke, cloud, fog | Particle Cloud | |
| Tube | fire works, spark, splash | Particle Cloud | Radius0 - radius of tail、Radius1 - radius of head、Tail - length |
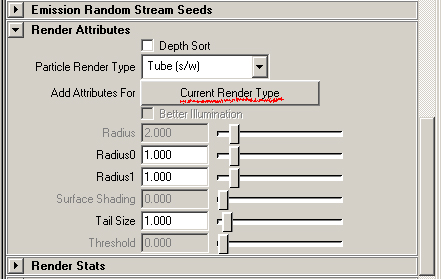
If you select the partilce render type, you should click Current Render Type button,
then suitable attributes are displayed.
 Setting the Particle Cloud material
If you select the Cloud or Tube render type, you should creat Particle Cloud material with Hypershade
Create > Volumetric Materials > Particle Cloud
and assign it to the particle.
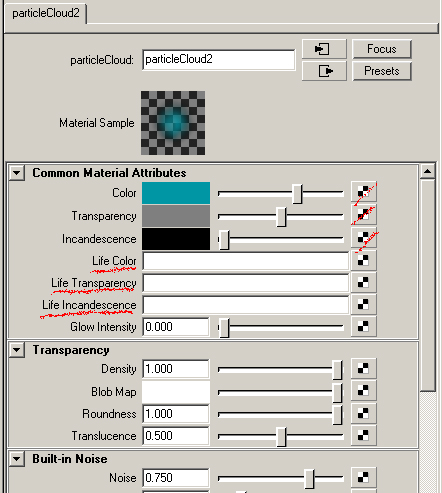
You should connect the Texture Mappings to Life Color, Life Transparency, Life Incandescence.
You should not connect them to Color, Transparency, Incandescence.
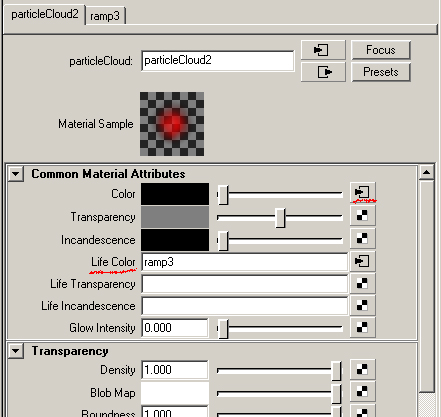
In the above, Ramp Texture is connected to Life Color,
and also connected automatically to Color.
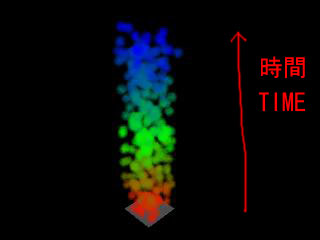
In the above, the particles are rendered with Ramp Texture connected.
The Texture is mapped to the time axis
(from the time a particle generated - to the time a particle disappears)
so you should select Constant or Random range
in the Lifespan mode attribute.
 fields
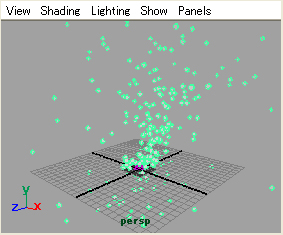
Select particle
Fields > Field Name
then the particle is cennected to the field,
and is influenced by the field.
If you want to connect another field to the particle,
select the particle again and
Fields > (another)Field Name
The types of fields are below
| Air | air,wind |
| Drag | friction,brake |
| Gravity | gravity |
| Newton | gravitation |
| Radial | pushes or pulls like a magnet |
| Turbulance | turbulance |
| Uniform | pushes objects in a uniform direction |
| Vortex | vortex |
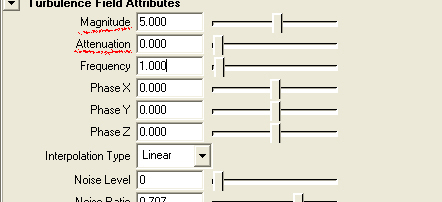
The attributes are different according to the fields,
but Magnitude and Attenuation are common.
Magnitude strength of field
Attenuation sets how much the strength of the field diminishes as distance
to the affected object increases.If it is 0, the force remains constant over distance.
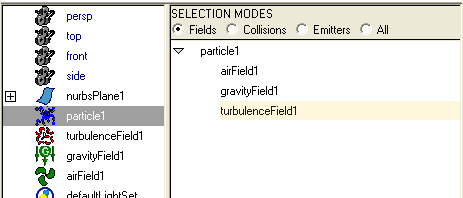
Window > Relationship Editors > Dynamic Relationships
The Dynamic Relationships window appears.
If you select particle in the left column, then the connected fields are highlighted.
If you turn off highlighting, it is not connected to the particle.

Your explanation is very nice. I want some more lessons.
Thank you for your visiting my site and your commenting.
I am writing the tutorial of making hair now.
I will add in 2 or 3 day.
Visit again, please.
I will write more.
Your tutorials are great! All of them are wonderful and well thought out.
Please keep it up.
Thank you for your visiting my site and commenting.
nice work
Thank you.
Nice ..........
Thanks
Thank you.
your explanation is very helpful.I want some more tutorials
Thanks so much for a such a great explanation of particle attributes and fields!
Very nice , but I couldn't figure out how to map the ramp to the time axis. I found no such attribute. Where is it supposed to be?
There is not time axis attribute.
If you connect Ramp Texture to Life Color,
particle color will change with time.