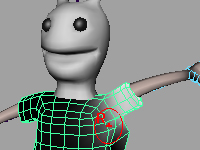
The deformation not intended might happen to the smooth binded skin.
You should adjust the skin weights and control the deformation.
For the explanation about the skeleton and skinning, please refer to
Maya: character setup (1): skeleton and skinning
 adjusting skin weights with the brush tool
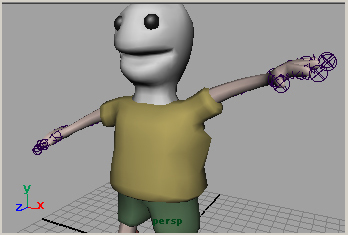
The deformation with the joints is proportional to the distance from the joints.
The level of the deformation is called skin weights in Maya,
and you change it with the brush tool.
The skin weights is allocated to vertices in polygon and it is allocated in CVs in NURBS.
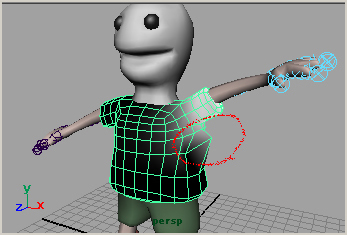
Select the object to which you adjust,
in the Animation menu set
Skin > Edit Smooth Skin > Paint Skin Weights Tool

The chosen object changes into the monochrome display as shown in the above
When it doesn't change into monochrome, or the display is changed while working,
click
 in the tool bar.
It is shown that near white or more, the stronger the influence of the joint is.
The deformation of the side is improper for the above figure.
You will paint the part black.
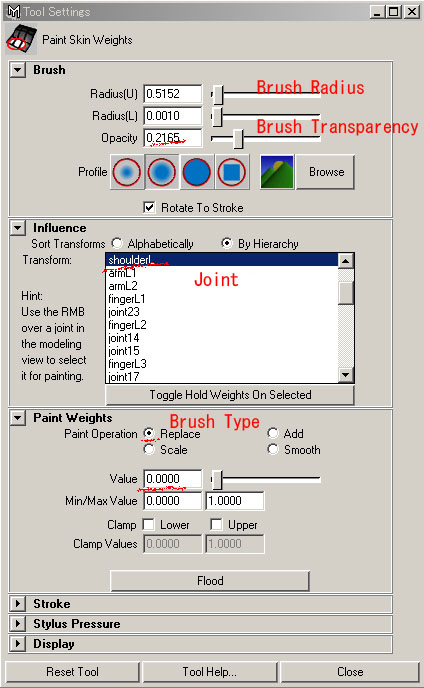
Moreover, the display changes into monochrome,
and the option window of the skin weights brush opens.
The list of the joints is displayed in Influence.
You select one joint that you want to adjust weight,
and you setup the following each item for painting.
| Radius(U) | Brush Radius (Rdius(L) is minimum radius when using pen stylus) |
| Opacity | Brush Transparency. In this case, strength. |
| Paint Operation | Replace When making it to black. |
| Add When making it to white. | |
| Scale Scale | |
| Smooth weight is made smooth. | |
| Value | Brush Brightness. The higher, the whiter. |
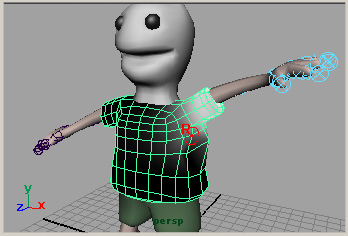
The cursor becomes the cursor of the brush tool in workspace, and you can paint.
The painting is done to Vertices in polygon, to CVs in NURBS.
This weights adjustment is done for each joints in each necessary objects.
If it is necessary, the weights is mirror copied.
Skin > Edit Smooth Skin > Mirror Skin Weights

The mirror copy in the direction of X specifies the Mirror Across ・YZ option.
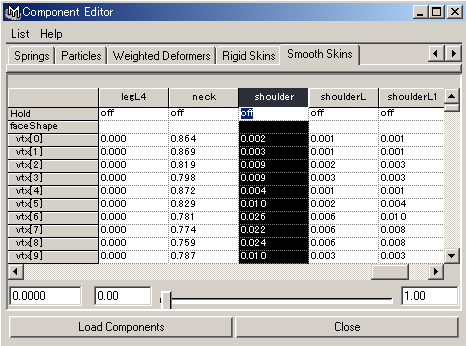
When you want to input the skin weights value,
you choose the vertices of polygon in the component mode.
And, you open the component editor.
Window > General Editors > Component Editor...
The adjustment of skin weights was completed in the step to here.
The trouble of modeling might be found at this stage.
You will have to correct it from the stage of modeling.
If so, you should ...
(1)Select the Root joint, and Skin > Go to Bind Pose
(2)Select the objects you should change, and Skin > Detach Skin
(3)Correct the objects.
(4)Selects the objects and the joint, and Skin > Bind Skin > Smooth Bind
(5)Adjust the skin weights again.
Because the skin weights disappears when the object is detached, you should readjust them.
 The objects that doesn't want to be deformed by the joints
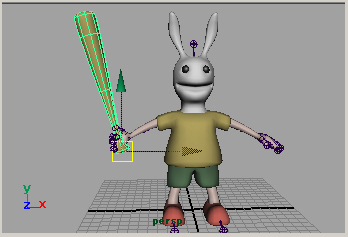
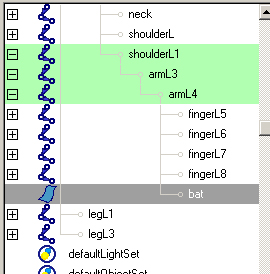
If there are objects that need not be deformed with the joints
like a bat which the character holds,
you make them a child of the joints like the above figure.
Bind need not be done.
Japanese article
Maya tutorials:character setup (2): adjusting skin weights

piease give me information about skinning & ik & fk setup
For IK handle, please see
Maya tutorials:character setup (3): IK handle
I found this site using google.com And i want to thank you for your work. You have done really very good site. Great work, great site! Thank you!
Sorry for offtopic
great work thx