In this tutorial, I explain two methods of making hair.
It is a method of using transparent mapping on NURBS
and using Paint Effects.
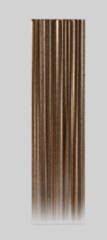
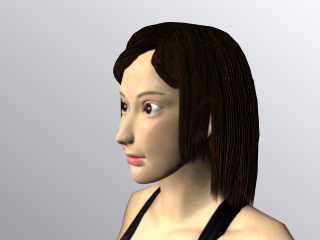
 hair with transparent mapping
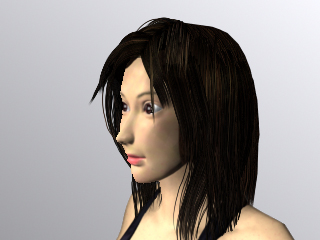
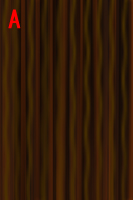
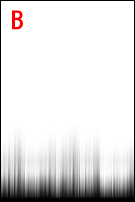
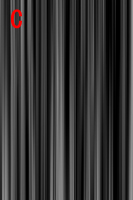
Prepare the texture images like the above figures.
Set them to the material
A Color
B Transparency and Specular Color
C Bump Mapping
(Set texture B to Transparency,
then drag-and-drop it to Specular Color with
 )
)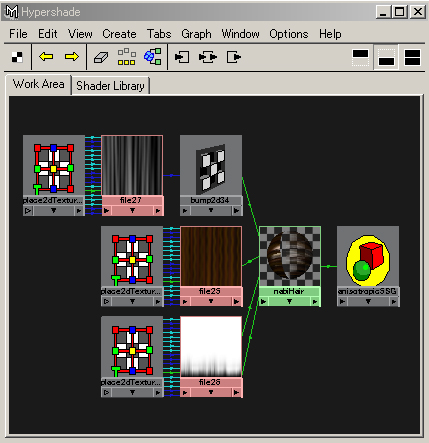
You will see the connection like the above.
Assign it to a NURBS plane.
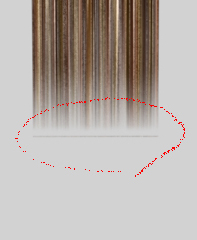
You will see that the edge is not slightly transparent.
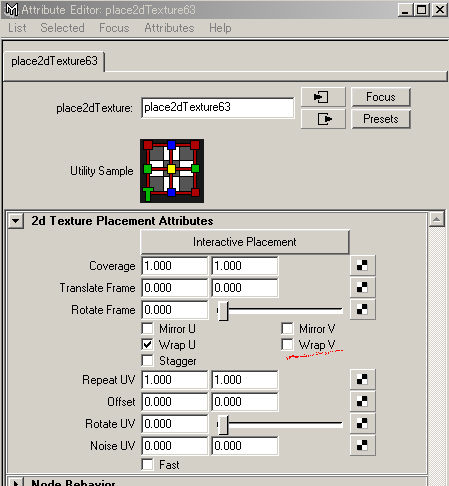
Uncheck WrapV (or WrapU) of the place2dTexture of the texture B.
WrapV (WrapU) means that the texture repeats toward V (U).
The pixels on the edge was blurred by the pixels on an opposite edge.
Therefore, the edge became opaque.
You deform NURBS and make the hairstyle.
(The rendering time is a little long because it is transparent.)
Basics of Paint Effects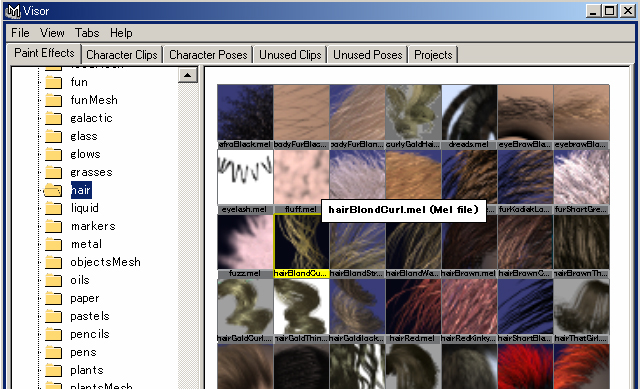
Open the Visor
Window > General Editors > Visor...
and select a brush.
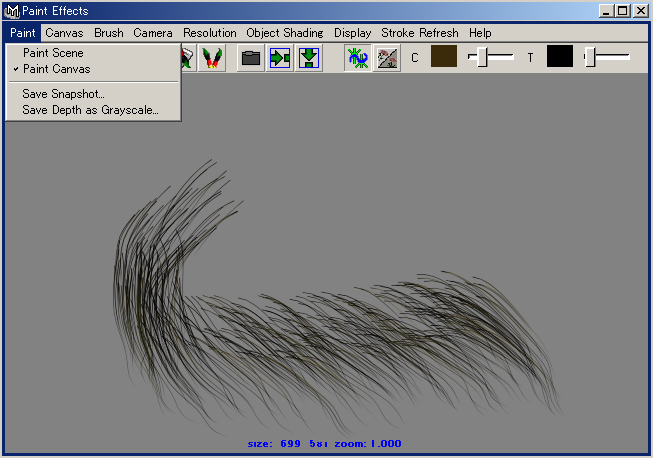
Open Paint Effects Window
Window > Paint Effects...
and check
Paint > Paint Canvas
Try painting.
Press b key and drug, you can change the size of the brush.
You can undo once, Canvas > Canvas Undo
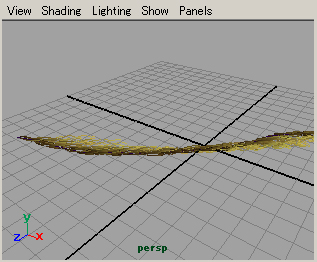
The brush stroke is drawn on the plane of y=0
when dragging it on the Persp Window.
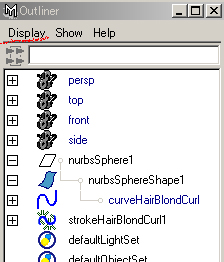
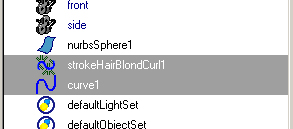
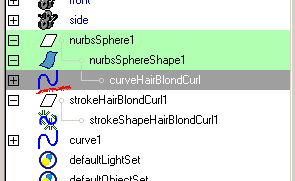
In the Outliner, you will see a node named stroke and a NURBS Curve.
Make a NURBS Primitive and select it,
and in the Render Menu Sets
Paint Effects > Make Paintable
Then you can draw the brush strokes on the NURBS surface.
In the Outliner, check Display > Shapes
you will see a NURBS curve (stroke path) under the NURBS object.
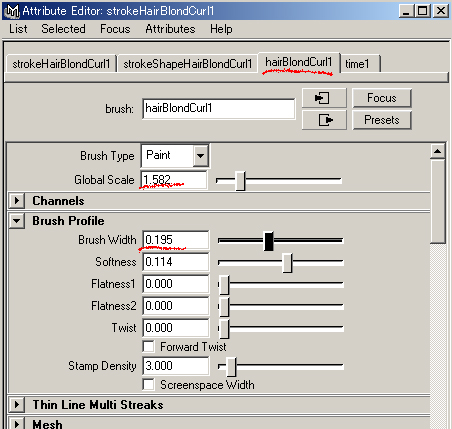
If you open the Attribute Editor of the stroke,
the attributes of the brush will appear.
Because there are quite a lot of numbers of the attributes,
I will explain only attributes necessary for making the hair.
Global Scale ... You cannot apply the scale to the Paint Effects brush with the scale tool.
you should apply the scale with this attribute.
you set 1, it is comprehensible to change all of the brush scale together.
Brush Profile > Brush Width ...brush width
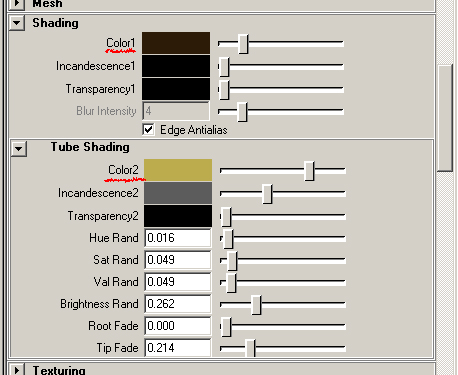
Shading > Color1 ...the color of the tube of the brush roots
Shading > Tube Shading > Color2 ...the color of the tube tip
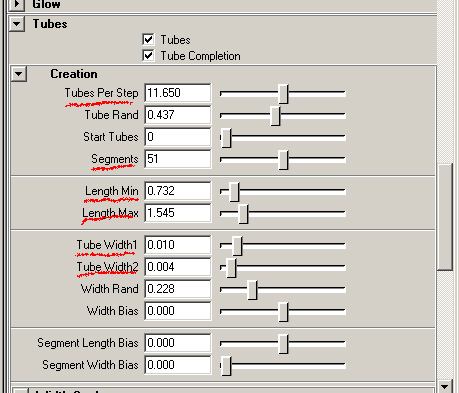
Tubes > Creation > Tubes Per Step ...density of the tubes of the brush
it will take the rendering time by increasing.
Tubes > Creation > Segments ...smoothness of the tubes
it will take the rendering time by increasing.
Tubes > Creation > Length Min ...length Min
Tubes > Creation > Length Max ...length Max
Tubes > Creation > Tube Width1 ...width of the tubes at the base
Tubes > Creation > Tube Width2 ...width of the tubes at the tip
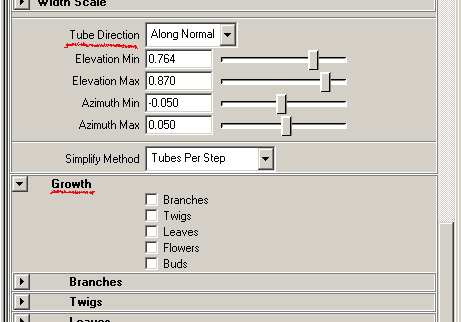
Tubes > Creation > Tube Direction ...select Along Normal,
the tubes are generated along the surface normal
Tubes > Growth ...select off for hair, select on for plants
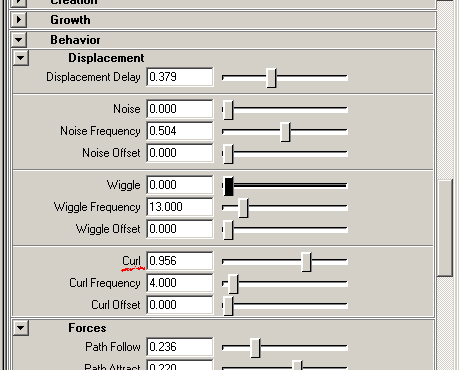
Tubes > Behavior > Displacement > Curl ...curl
making the hairstyle with Paint Effects
Make a NURBS curve near the tubes of the brush,
select them in order of the stroke and the curve,
Paint Effects > Curve Utilities > Set Stroke Control Curves
then the tubes of the brush will be along the curve.
Move CVs of the curve and set the direction of the tubes.
The curve (control curve) is even two or more acceptable.
Moving the curve on the surface, you can adjust the place of the brush.
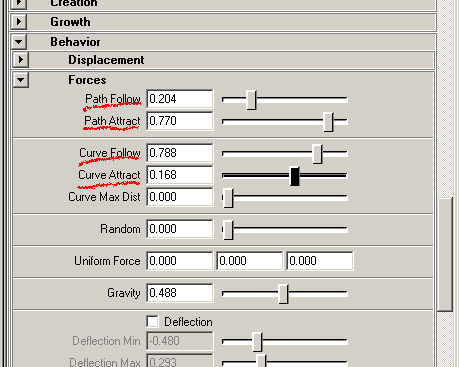
Tubes > Behavior > Forces > Path Follow
degree how tubes grow along the stroke path
Tubes > Behavior > Forces > Path Attract
degree how tubes attracted to the stroke path
Tubes > Behavior > Forces > Curve Follow
degree along control curve set according to procedure above.
Tubes > Behavior > Forces > Curve Attract
degree attracted to control curve set according to procedure above.
To draw on the polygon by Paint Effects, it is necessary to set UVs.
You may put the NURBS in the polygon, and you may draw on it.
You can set the display accuracy in the workspace of Paint Effects brush,
Display > Rendering > Stroke Display Quality >
The display non-display of each window can be set,
Show > Strokes
As for Paint Effects, it takes rendering time.
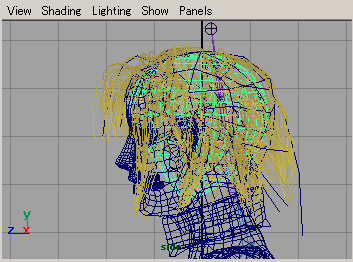
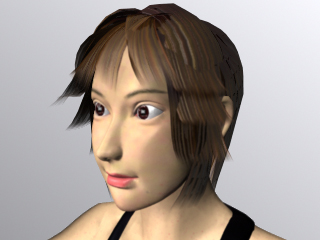
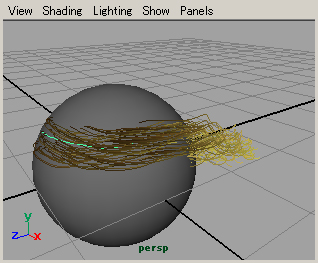
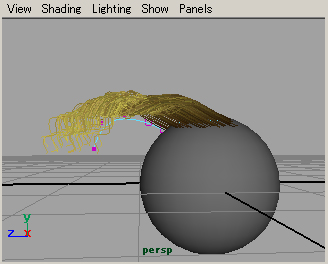
I made a rough hairstyle from the NURBS object,
and added the hair of Paint Effects there.
They are above figures.

good
Thank you.
Impressive tutorial . I will definetely try it later on today!Thanks!.